The weather over the last couple of weeks has been great. Upper 80’s (F) into the lower 90’s so I have been outside when I can. Instead of doing too much more work I relaxed a bit. I did end up finishing the truckbed liner coating on the inside before the DATR show.
If you haven’t seen the pictures yet click my mug:

The main show I look forward to every year 🙂 I love seeing the creativity and cleanliness brought to the table this year. This is one show that you don’t want to miss when it rolls around. (latest updates at http://www.dubsalongtherockies.com ) Anyone who is just getting into cars, especially imports, I would highly recommend attending this show. I started going in 2004 and have missed three years due to work, broken Corrado, etc. Whenever I do come I bring something to enter into the show, this year I brought the Vanagon because the Corrado is in hibernation right now. I got lots of great comments and met lots of curious and enthusiastic people, I parked with the front facing outwards which I could have reconsidered. Those that did walk to the back were in for quite a treat, I don’t like how the speaker-box covers portions of the engine it takes away from the complete image. (I haven’t snapped any pictures yet since adding the liner so I will here in a couple of days and immediately update for you.) This year’s show was held at Pikes Peak International Raceway and had an autocross event along side the show, and it was loads of fun to watch. I didn’t want to enter the Vanagon into the race, that’s what the other car is for. When the Autocross event returns the next time I’ll have the Corrado, with videos. This year’s venue has a great capacity so if the show gets national attention again and attendance doubles it’s easily supported. Colorado needs to represent in this category! We got some of the twistiest, in some cases most demanding roads in the country and there’s nothing better than getting together in a group and tearin’ it up. Forced induction in most cases supplies enough fun for any car, combine it with German engineering and it’s glued.
The Van did well, better than I expected because I won something! The respray job is mediocre at best because it’s DIY in my garage. The judging is tough but I like it this way, those who put the work in are the ones that get noted. More-so then the judging many of those that took notice had plenty of positive comments for me which was very rewarding, I always enjoy hearing the feedback.
Sorry to cut this short, part 2 coming up later tomorrow 🙂
8/30/2010 Update:So what else has been happening?
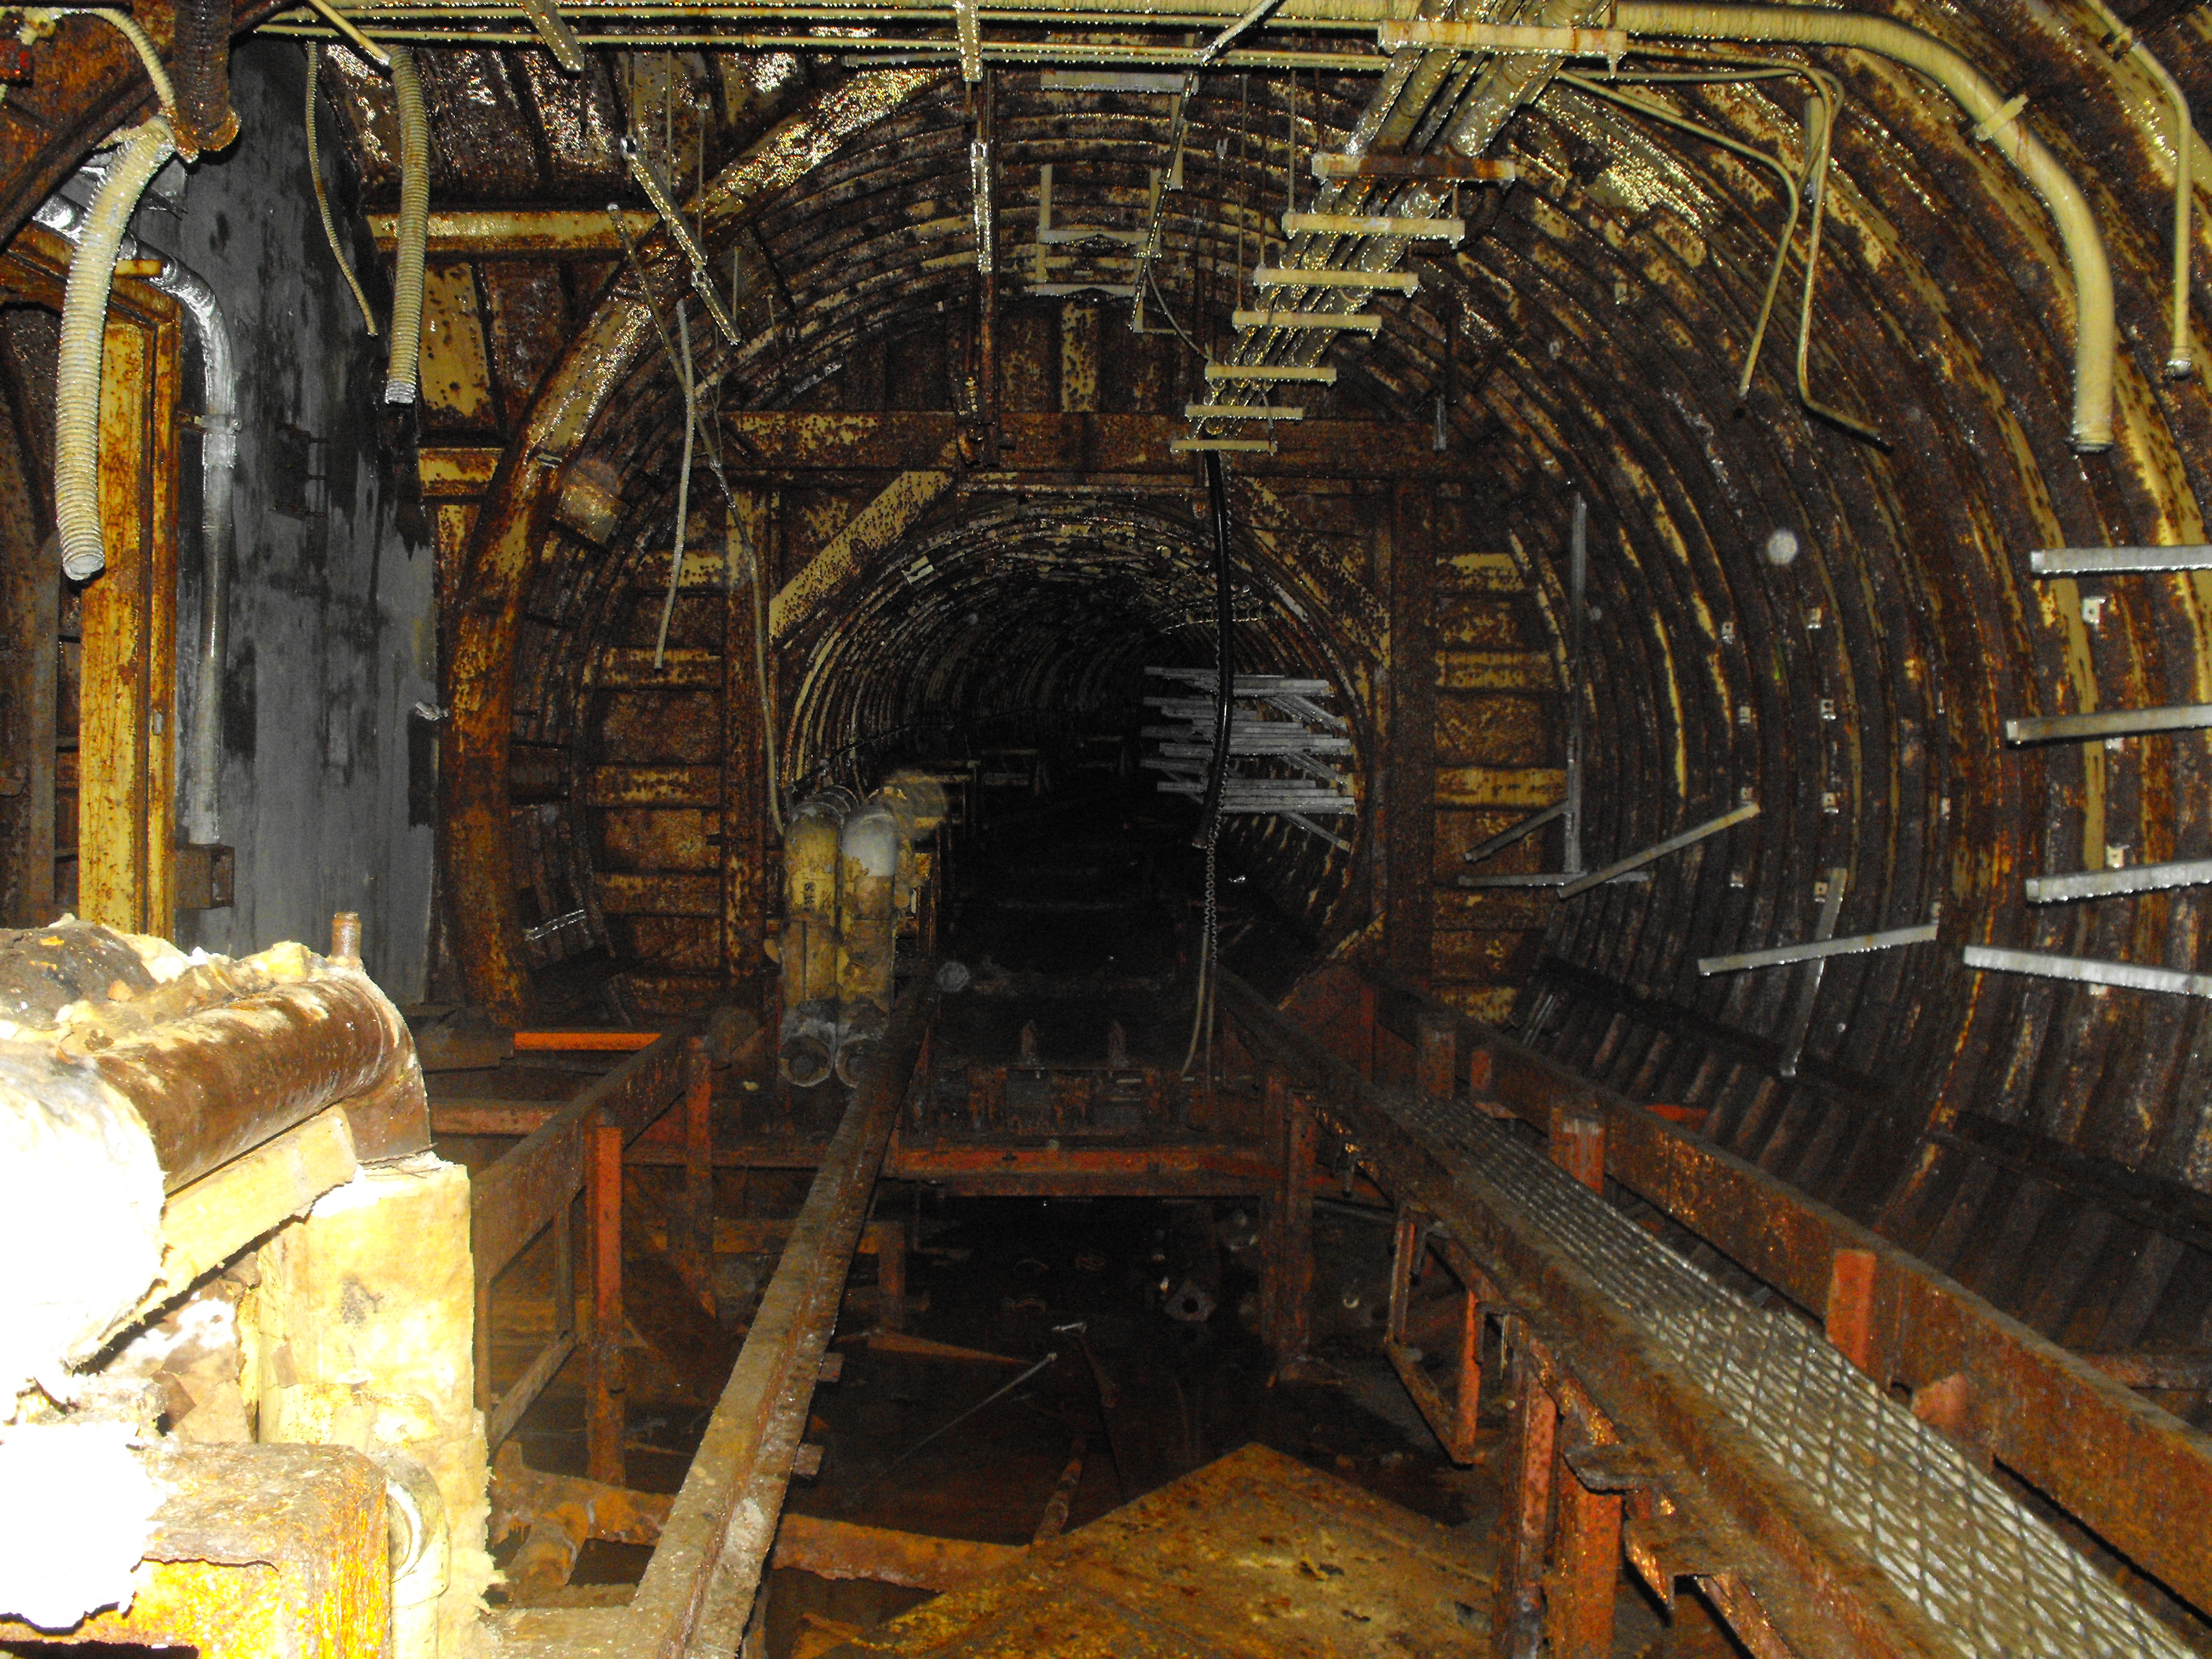
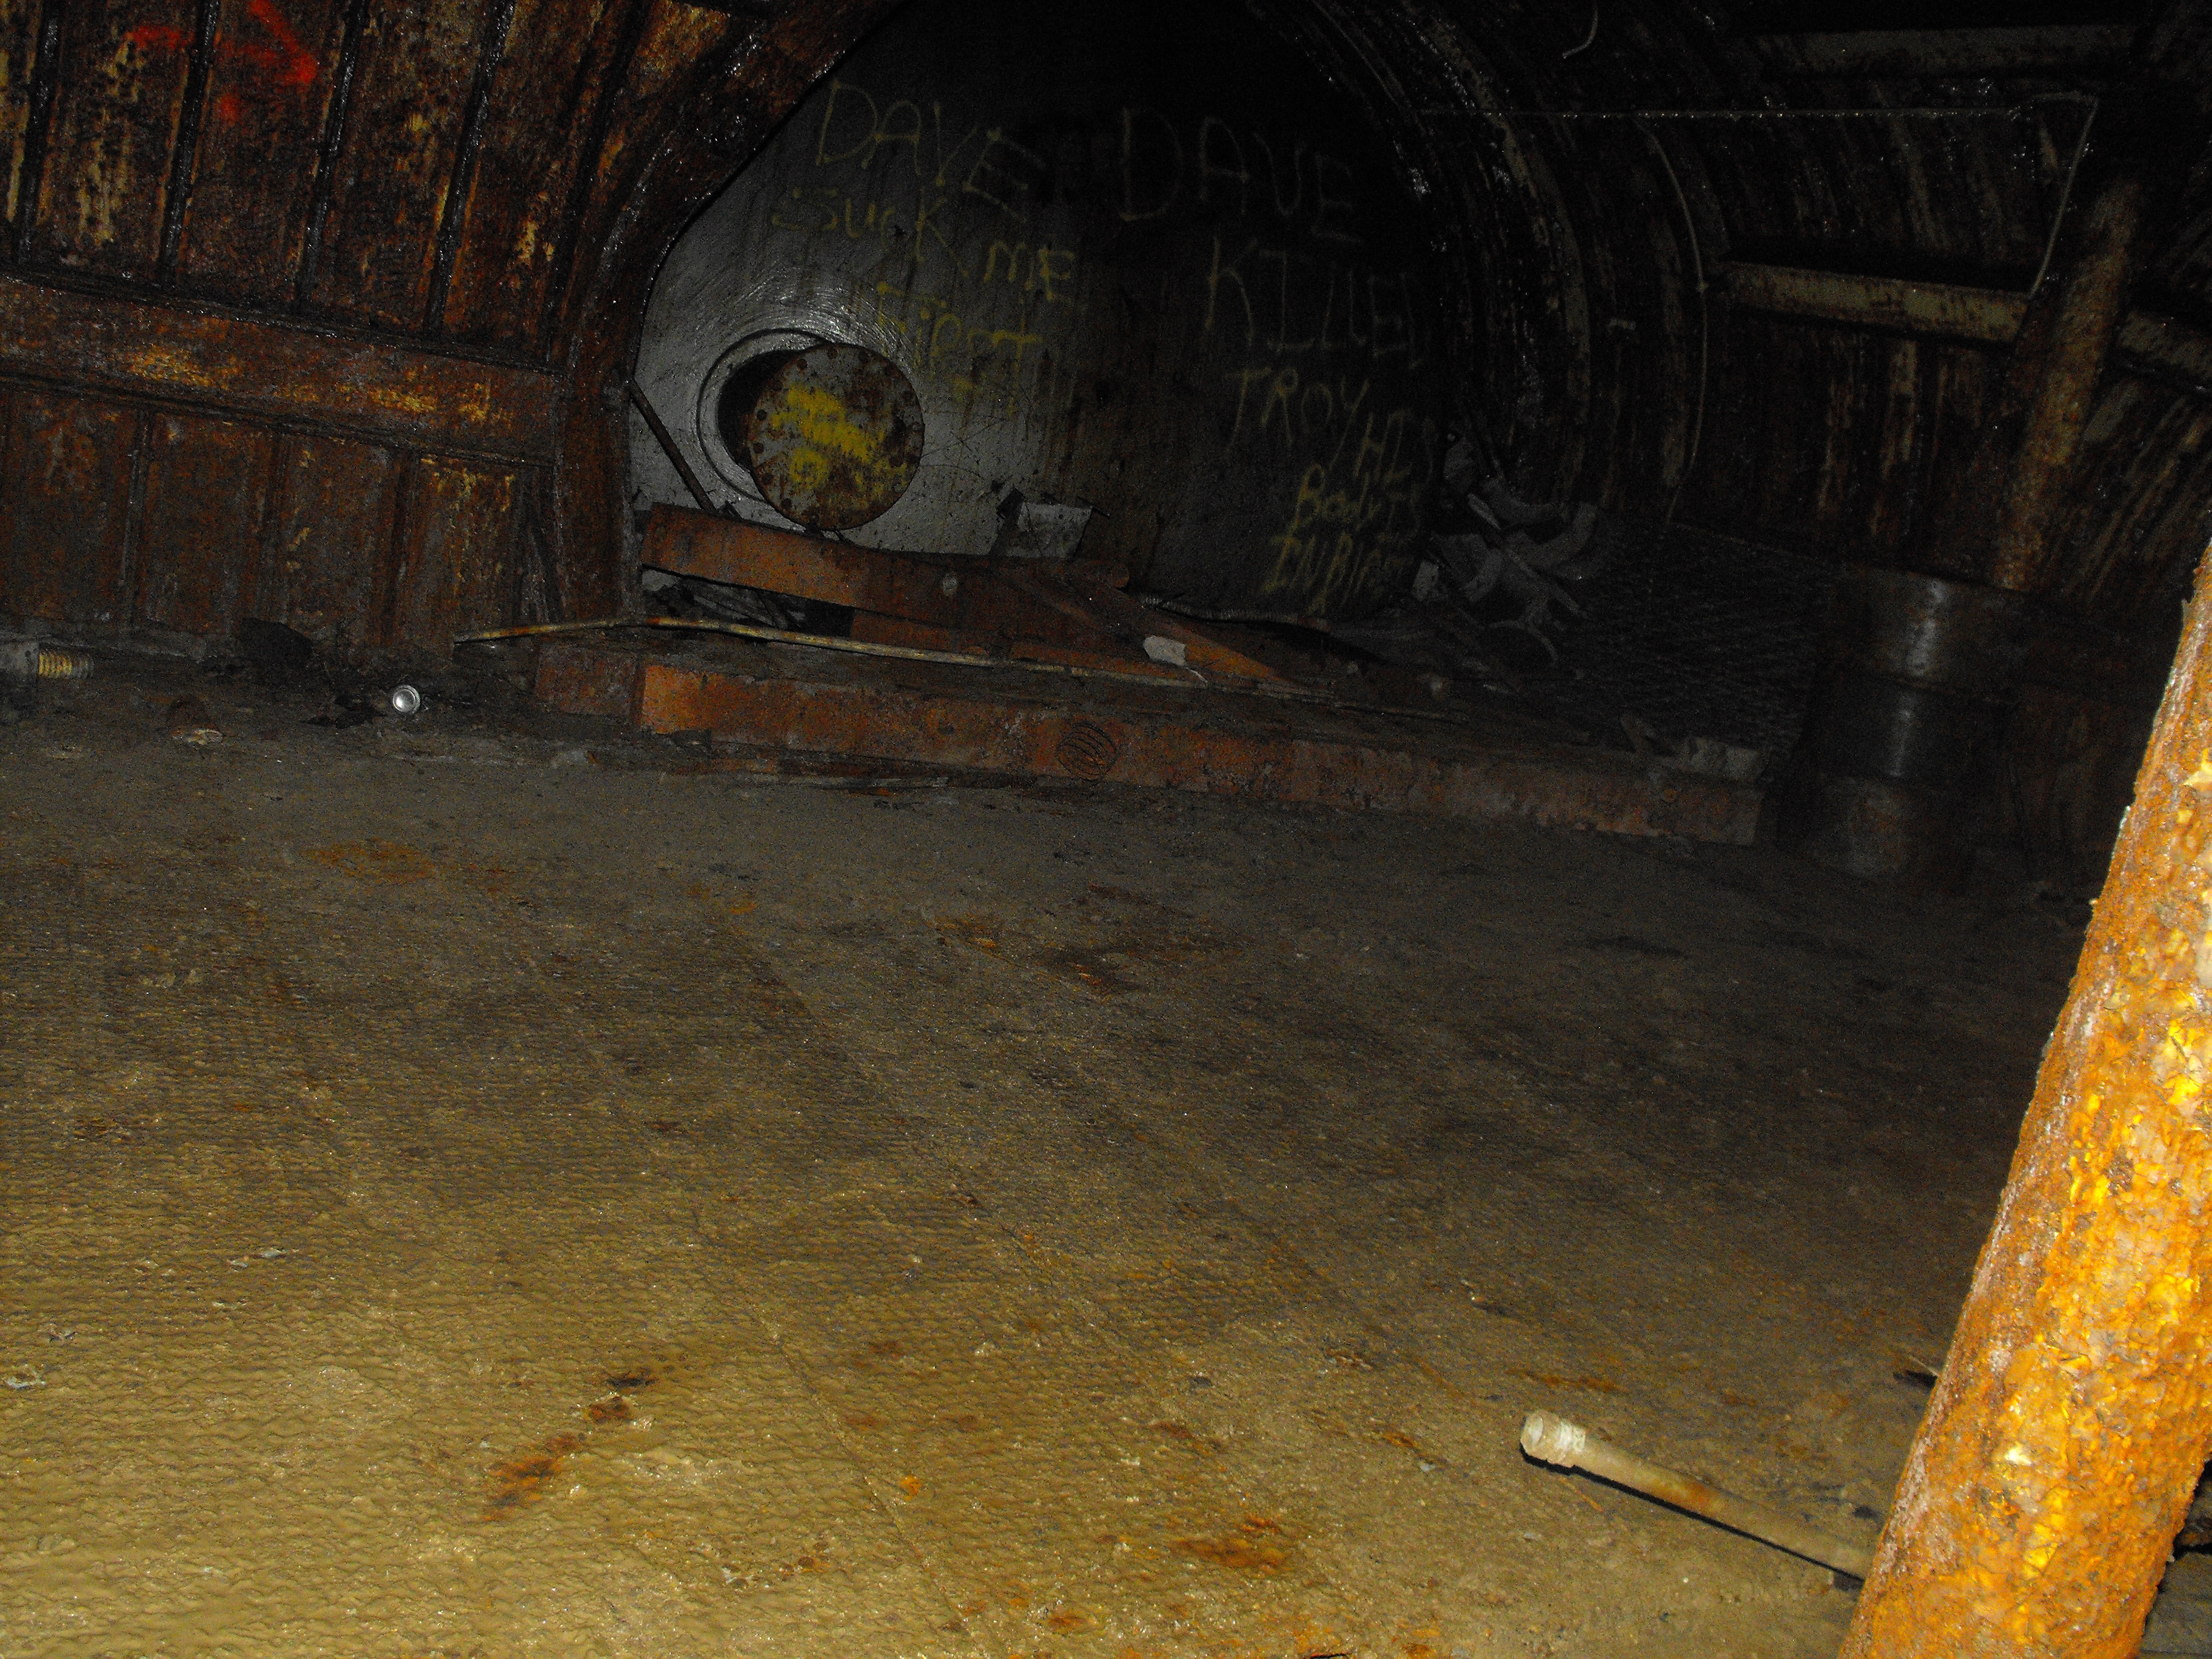
Well, every year we do a little “urban exploration” by going out to this abandoned titan I missile silo. Located out near deer trail this cold war relic was abandoned by Military in the late 60’s and since then an unknown amount of people have given themselves tours throughout. I have been back several times to monitor the progression of the destruction. It’s been most interesting coming back and seeing whats changed. I really want to preserve this somehow but have no clue how to set about it.
I didn’t get as far in as I wanted as the “balance beams” you walk to get to the launcher area were too muddy, nonetheless here are some photos:
There wasn’t a noticeable amount of metal missing however I have reason to believe that people are scrapping this silo out. There is a 2nd catwalk placed down now on the 2nd level of the power dome where people get across to get into this one. The large blower that is also at the entrance has been cut up now with a gas axe it looks like. The bearing support was hacked on both sides and the large squirrel cage wheel no longer freely rotates.
It’s really sad to see this one go, I would love to save another one nearby if possible so at the very least us as a group of friends is looking into it. If its the owners of the silo scrapping it out I can understand why, its really destroyed beyond restoration at this point, well not without a couple million bucks anyways. All of the bullet holes riddled in everything combined with all the missing pieces make this one a loss.
UPSclaus also brought me a new piece of test gear this week. A Tektronix 3001gpx 1GHz Logic Analyzer. I picked this thing up for a deal I couldn’t pass up and snagged the original software for it and some 720k floppies. Once it arrived I cleaned it and powered it up to find that everything worked perfect!
Using a micro controller I programmed a test pattern into the system with 4 lines and tested the logic analyzer with it:
Closer up shot of whats up, I also did a full 16 bit test while testing one of my micro-controllers so I’ll have to post a screen shot of that later on.
This thing can read up to 80 channels simultaneously, very nice! It’s really more than I would need but it’s sure going to be handy when developing my circuits and reverse engineering ECU’s.
That’s the other thing, this guy has some sort of rom emulation feature (haven’t found it yet) as well as a 68020 and 030 disassembler. Crazy! Interestingly enough VR6 Motoronic uses the 030 (or maybe it was digifant I) so maybe I will be tempted to mess around with a factory ECU before ditching it in the favor of megasquirt.
What a great piece of hardware that’ll serve me for years to come. My new PC based O-Scope is out for repairs, hopefully it gets back here soon.


8/31 Update
Got some screen shots from the logic analyzer:I actually tested 16 bits at a time using a Basic Stamp 2. The program I created just makes each pin high in sequence, then delays 100ms and starts pulling each output low starting from the last pin and working its way back up. This creates a pyramid style shape on the logic analyzer screen with the 100ms delay on each end.
In this first screen shot I measure the delay to check for correctness, and the delay actually measures out to be correct:
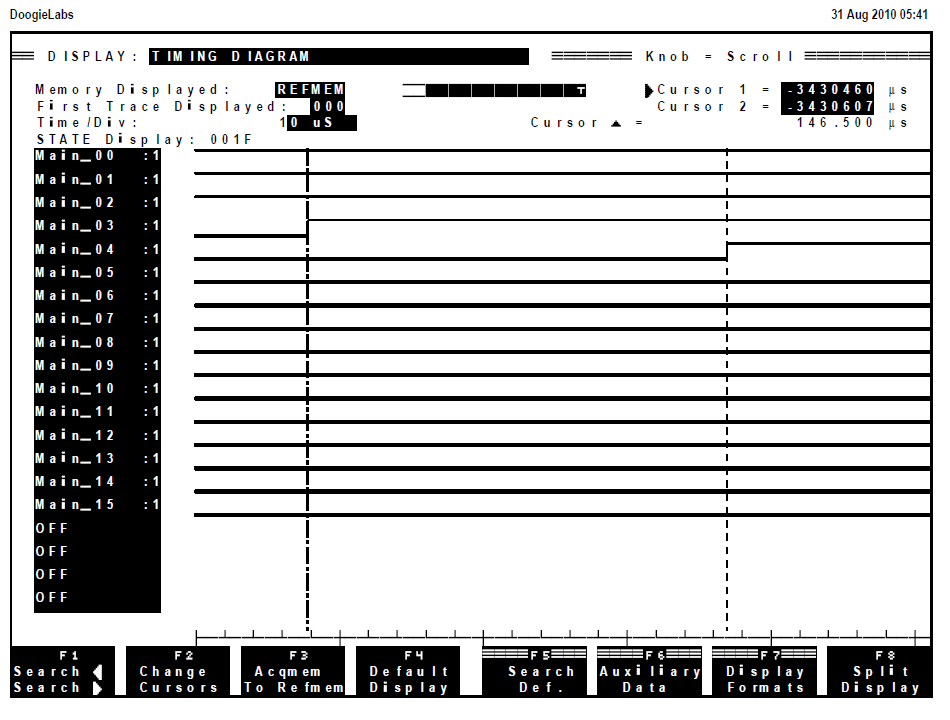
I then zoomed in far and studied the execution time it takes to complete the next instruction. This actually varies ever so slightly depending on the instruction issued and did manage to find this difference in here. In this screen shot I measured the time it took start to pull the 2nd output back to high and measured out 150microseconds:
Then in measuring other parts I noticed that some were slightly different like this one at 140microseconds:
I zoomed in for a closer look, when changing the time base to 10microseconds a clearer picture emerged, it showed the instruction actually took 146.5 microseconds to complete so a little closer to 150 than a full 10microseconds:
It was a successful test exercise, I am now better acquainted with my equipment and it’s capabilities. I am tempted to hook it up to an eprom in a running ECU to log some data, maybe I’ll do that here in a couple of weeks. I would like to hook up a pic with the same sort of test program and measure the execution time on it. Compared side by side with the Basicstamp I bet that makes for some interesting numbers on speed.
Until next time, take it easy 🙂