Got more done today!
I pressure washed the JDM block and tore it down a little more. There were many wiring loom pieces, as well as random old leaves and a cigarette butt. I blew all of that out and gave the block a good look over for cracks:
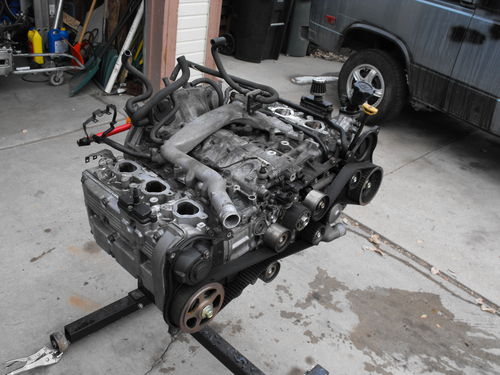
It was interesting studying the markings and comparing them to the other engine.
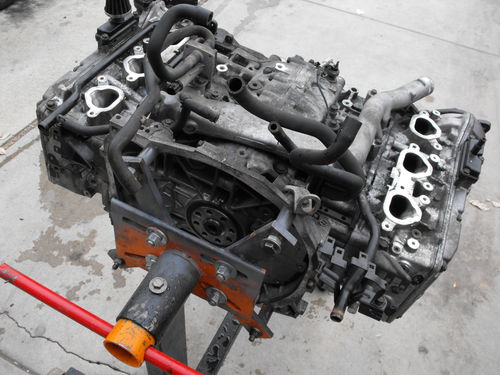
Start of EG33 Failure analysis
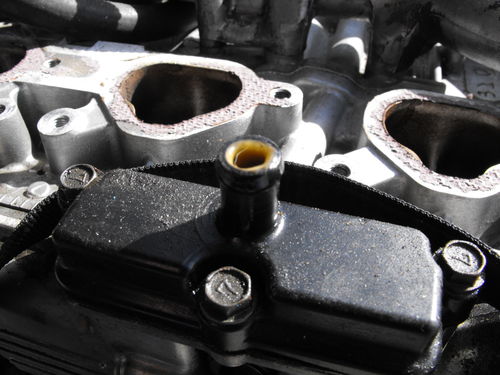
One thing I will be closely studying is why the oil pressure went awry on this engine. The oil pressure would actually remain normal and as the engine warmed up it would lose pressure, i.e. idle pressure would be .5psi, completely unacceptable. Interestingly enough as mileage progressed on the oil change it would get worse and 200 miles in I decided to change the oil and see what happened. After that I was able to actually drive the van for a while get it up to regular temperature but after 100 miles or so the hot oil pressure was back to it’s sub-par numbers. One day I noticed a foamy substance had spilled over the valve cover breathers and down the sides of the valve cover, after getting the engine out I started my examination. I noticed this goop had collected at the breather hole I hypothesize this is a result from moisture in the oil:
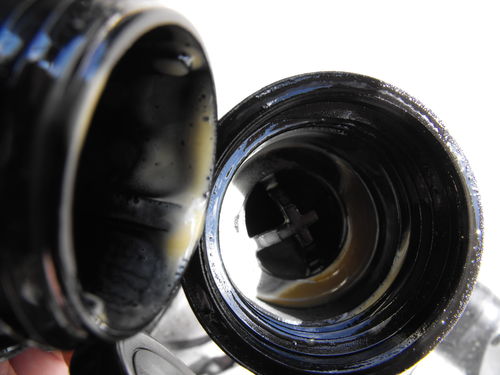
Here is underneath the oil cap, what is interesting about this is every time that I drain the oil there doesn’t appear to be any coolant mixed in with it. (no milkshake) I only get this? Remember that the engine actually still runs great! The rings seem to seal as there is no “volcano of smoke” when you remove the oil cap:
I suspect that some of my issues are caused from a cracked block, while examining the rest of the motor I also found an oil leak, there was a pool in the webbing on the topside of the block and I traced it back to a freeze plug. I cleaned away the area for the picture (remember you can always click for super-sized picture) but it definitely appears to be a crack:
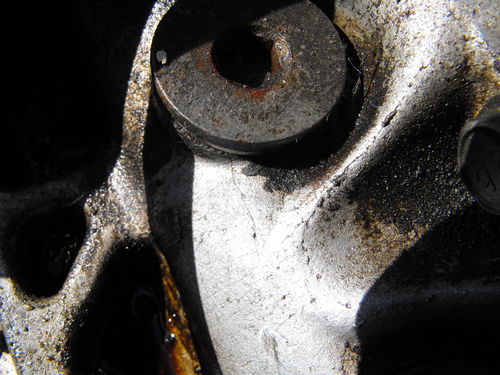
The oil pool is in the bottom left of the picture, for the crack look at about 6 o’clock on the freeze plug above.
Timing cover restoration
To keep the engine at it best in performance and appearance I have decided to pay special attention to the cracking timing covers. The USDM engine I had ended up having a timing belt service done and as a result all of the covers were destroyed. The holes the nuts sit in were either rounded out, or broken off completely. I had originally suspected that the reason the US ones were broken because of neglect but after looking at these I suspect that much of the damage can be attributed to the plastics actually changing in size. Since the mouting points stay staionary the plastic moves around it effectively cracking around the mounting points. As far as I could tell the timing belt either had just been serviced, or was never serviced. Since the engine still had all Subaru parts (including oil filter) you can tell it was last serviced at the dealership. I ended up taking some two part epoxy and filling in the cracks, here is what they looked like before:
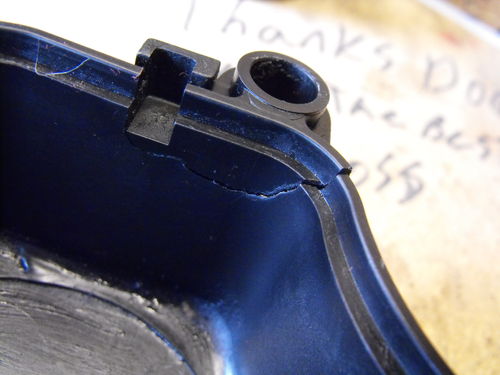
Looking at this next image you can see why I would suspect shrinkage causing the cracking. There is a crack forming where none of it actually touches the edges, however the crack doesn’t go through to the other side:
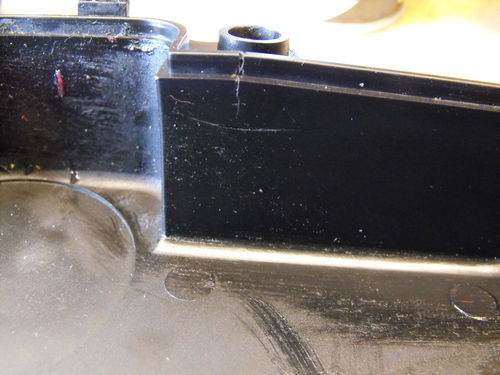
Here is another shot, now that I look at them again it’s really hard to say, maybe the dealer did perform a timing belt service:
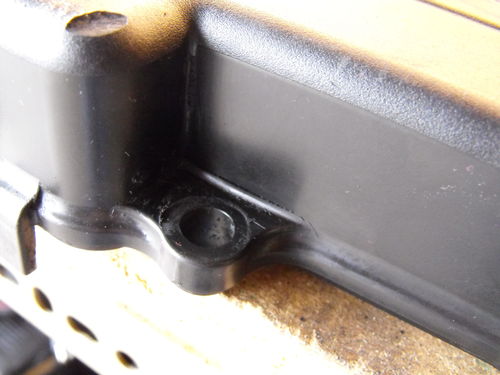
The tensioner did seem cleaner than the rest of the parts and possibly newer, there was an “05” written underneath the plastic cover so who knows? it’s all getting changed again anyway.
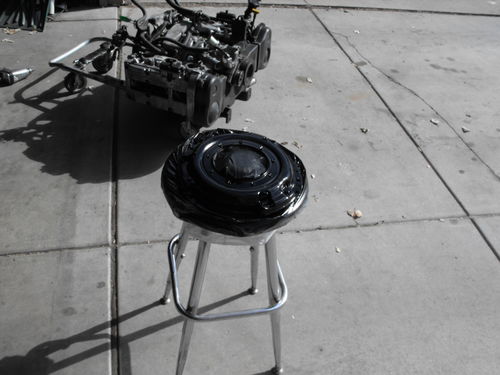
One of the other things that I did was I also re-painted my pressure plate. Due to the major brake fluid leakage it paint-stripped all of the red off the pressure plate, I went for a nice gloss black (high heat):
 Got more done today!
I pressure washed the JDM block and tore it down a little more. There were many wiring loom pieces, as well as random old leaves and a cigarette butt. I blew all of that out and gave the block a good look over for cracks:

It was interesting studying the markings and comparing them to the other engine.

Start of EG33 Failure analysis
One thing I will be closely studying is why the oil pressure went awry on this engine. The oil pressure would actually remain normal and as the engine warmed up it would lose pressure, i.e. idle pressure would be .5psi, completely unacceptable. Interestingly enough as mileage progressed on the oil change it would get worse and 200 miles in I decided to change the oil and see what happened. After that I was able to actually drive the van for a while get it up to regular temperature but after 100 miles or so the hot oil pressure was back to it’s sub-par numbers. One day I noticed a foamy substance had spilled over the valve cover breathers and down the sides of the valve cover, after getting the engine out I started my examination. I noticed this goop had collected at the breather hole I hypothesize this is a result from moisture in the oil:

Here is underneath the oil cap, what is interesting about this is every time that I drain the oil there doesn’t appear to be any coolant mixed in with it. (no milkshake) I only get this? Remember that the engine actually still runs great! The rings seem to seal as there is no “volcano of smoke” when you remove the oil cap:

I suspect that some of my issues are caused from a cracked block, while examining the rest of the motor I also found an oil leak, there was a pool in the webbing on the topside of the block and I traced it back to a freeze plug. I cleaned away the area for the picture (remember you can always click for super-sized picture) but it definitely appears to be a crack:

The oil pool is in the bottom left of the picture, for the crack look at about 6 o’clock on the freeze plug above.
Timing cover restoration
To keep the engine at it best in performance and appearance I have decided to pay special attention to the cracking timing covers. The USDM engine I had ended up having a timing belt service done and as a result all of the covers were destroyed. The holes the nuts sit in were either rounded out, or broken off completely. I had originally suspected that the reason the US ones were broken because of neglect but after looking at these I suspect that much of the damage can be attributed to the plastics actually changing in size. Since the mouting points stay staionary the plastic moves around it effectively cracking around the mounting points. As far as I could tell the timing belt either had just been serviced, or was never serviced. Since the engine still had all Subaru parts (including oil filter) you can tell it was last serviced at the dealership. I ended up taking some two part epoxy and filling in the cracks, here is what they looked like before:

Looking at this next image you can see why I would suspect shrinkage causing the cracking. There is a crack forming where none of it actually touches the edges, however the crack doesn’t go through to the other side:

Here is another shot, now that I look at them again it’s really hard to say, maybe the dealer did perform a timing belt service:

The tensioner did seem cleaner than the rest of the parts and possibly newer, there was an “05” written underneath the plastic cover so who knows? it’s all getting changed again anyway.
One of the other things that I did was I also re-painted my pressure plate. Due to the major brake fluid leakage it paint-stripped all of the red off the pressure plate, I went for a nice gloss black (high heat):


