
Progress is starting to pick up!
South African lower grill and lights have arrived!
This is a big turning point for me and this project, this completely changed the looks of the Van, actually I was quite in shock standing in front of it for the first time as looking at it in person is much different than any picture.

I already had the HID ballasts on hand and just needed to order the H3 Bulbs which were only $15.00! HID stuff is incredibly cheap nowdays and the safety is unparalleled. It stinks to test fit them because they are going to be removed again in a few days for paint prep / body work but it was a huge motivational booster to see them installed 🙂

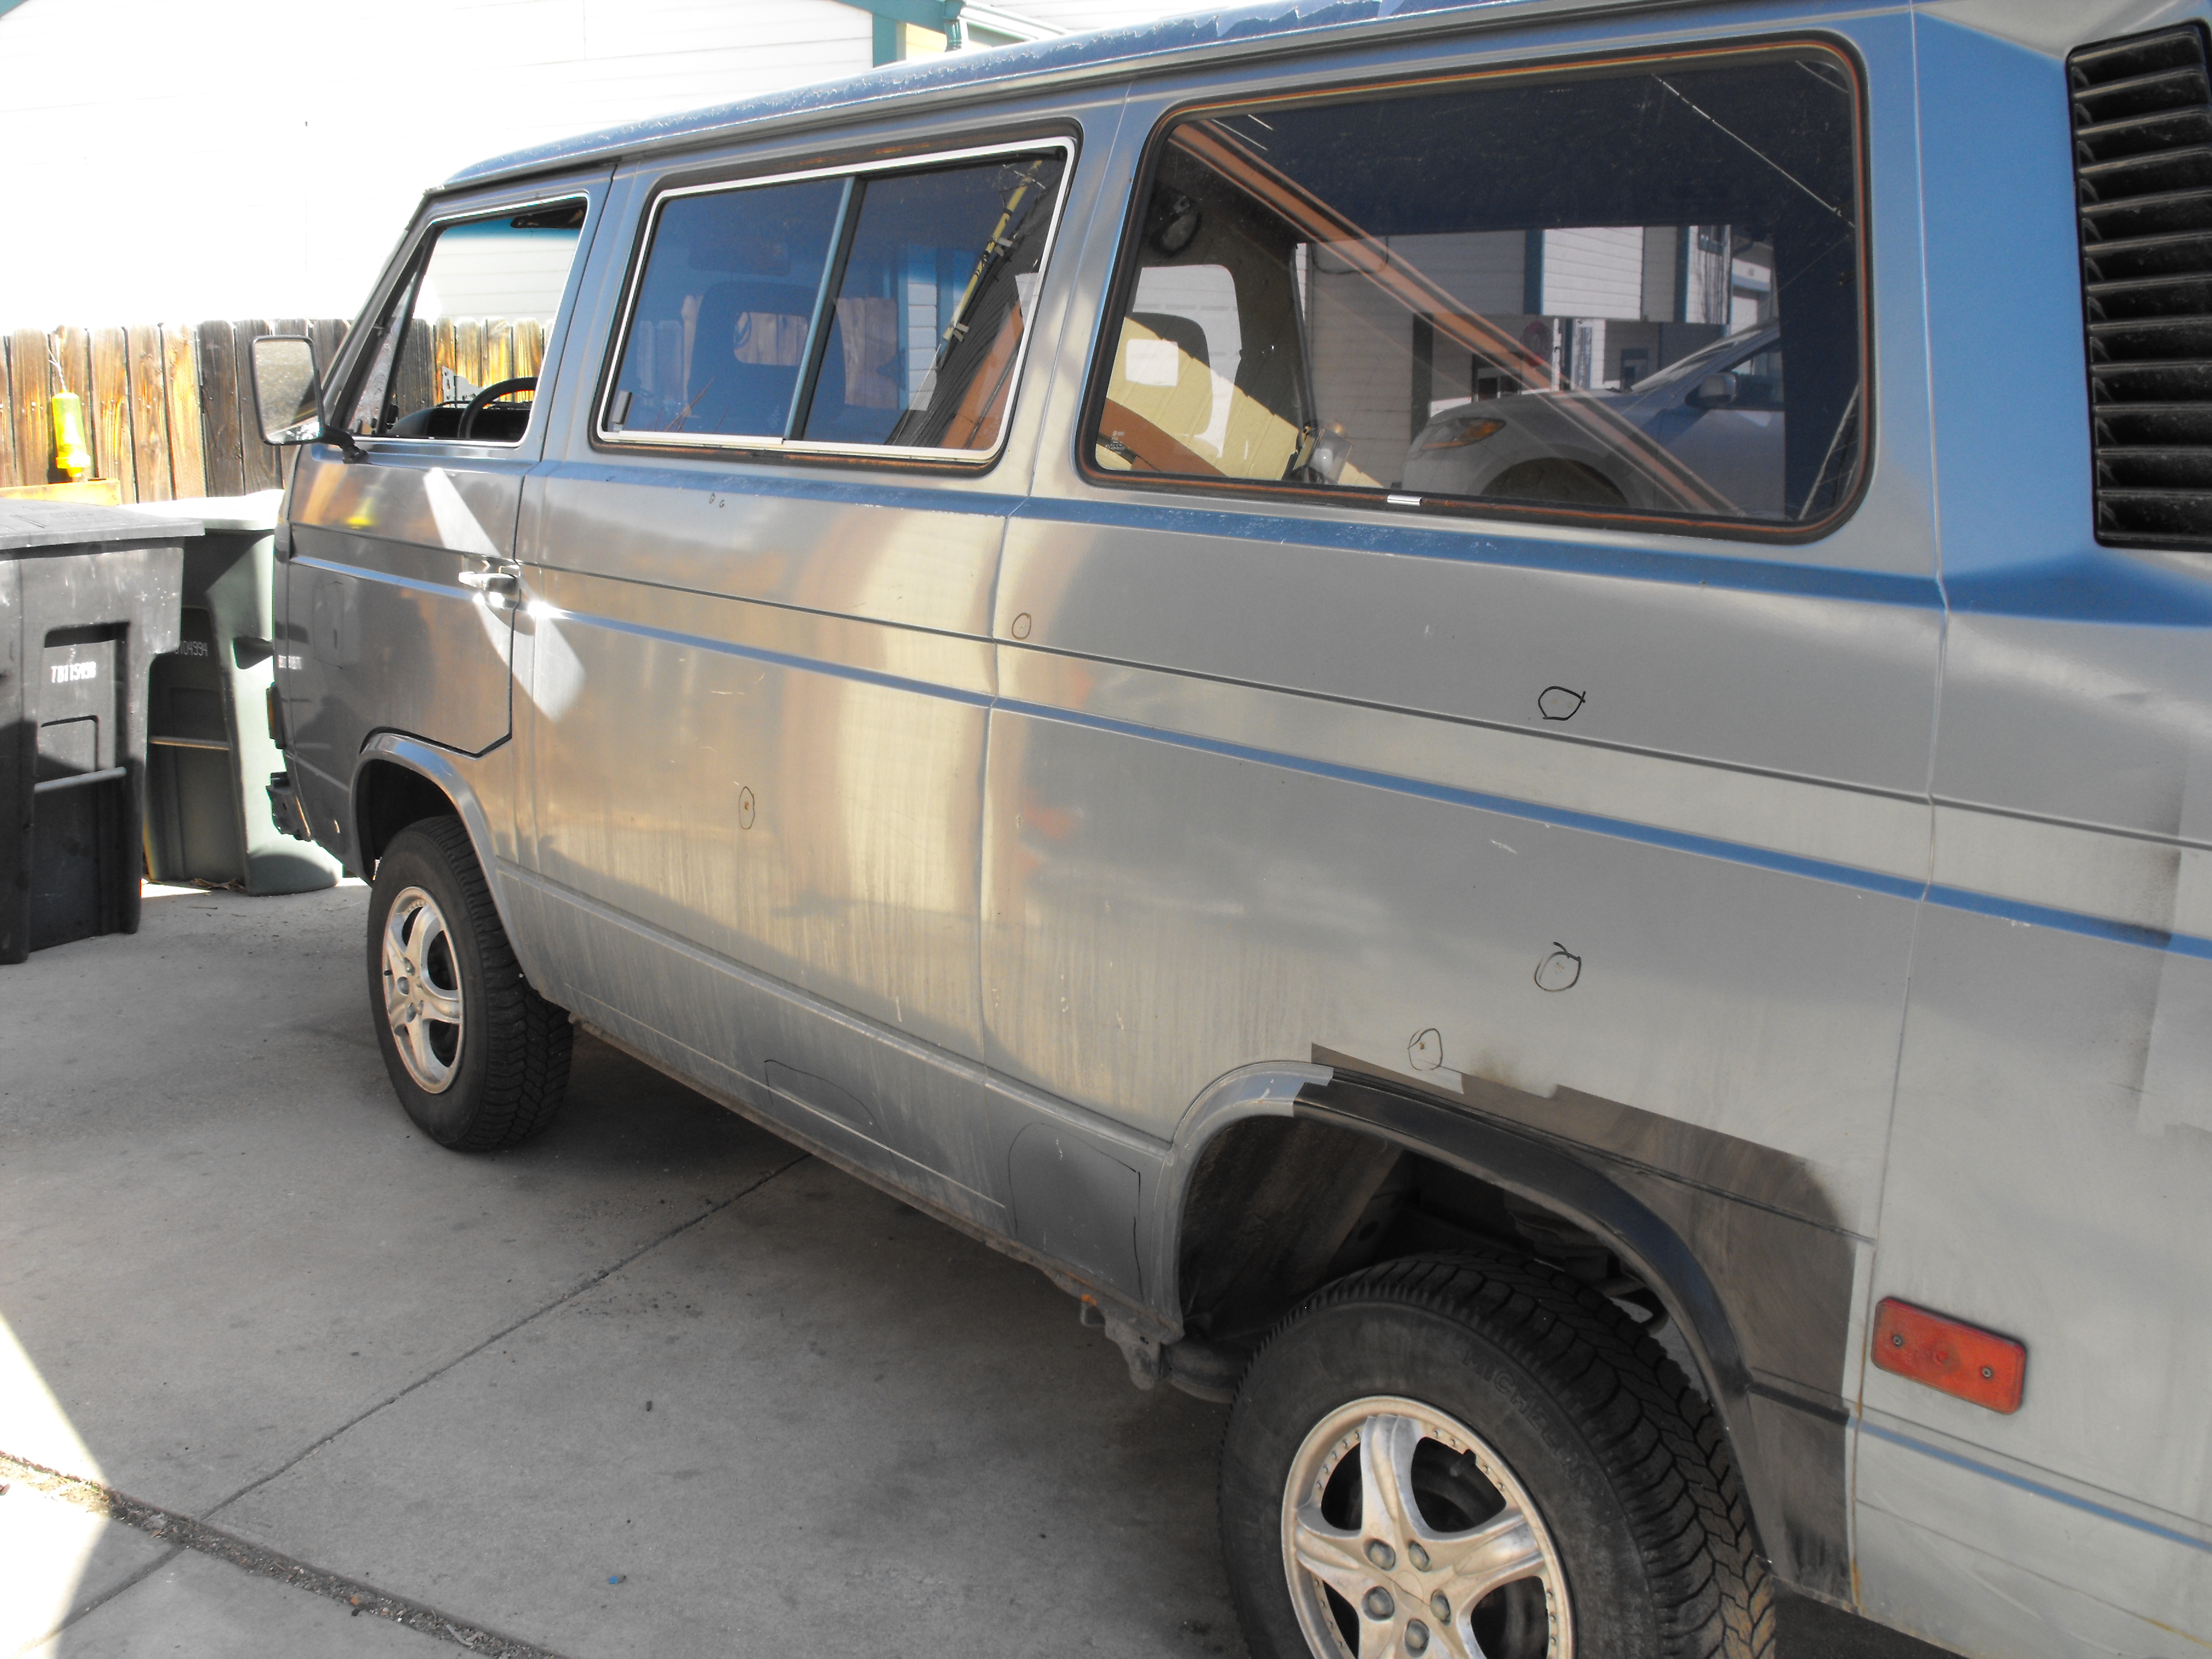
I also started my body work adventure on the driver’s side.. In all reality it had about the same damage as the passenger side (with the exception of the wheel arch which was damaged on the drivers but not passenger side.) First we start with a little nip/tuck sharpie writing. The marked areas not only include dings and dents but also minor rust spots:
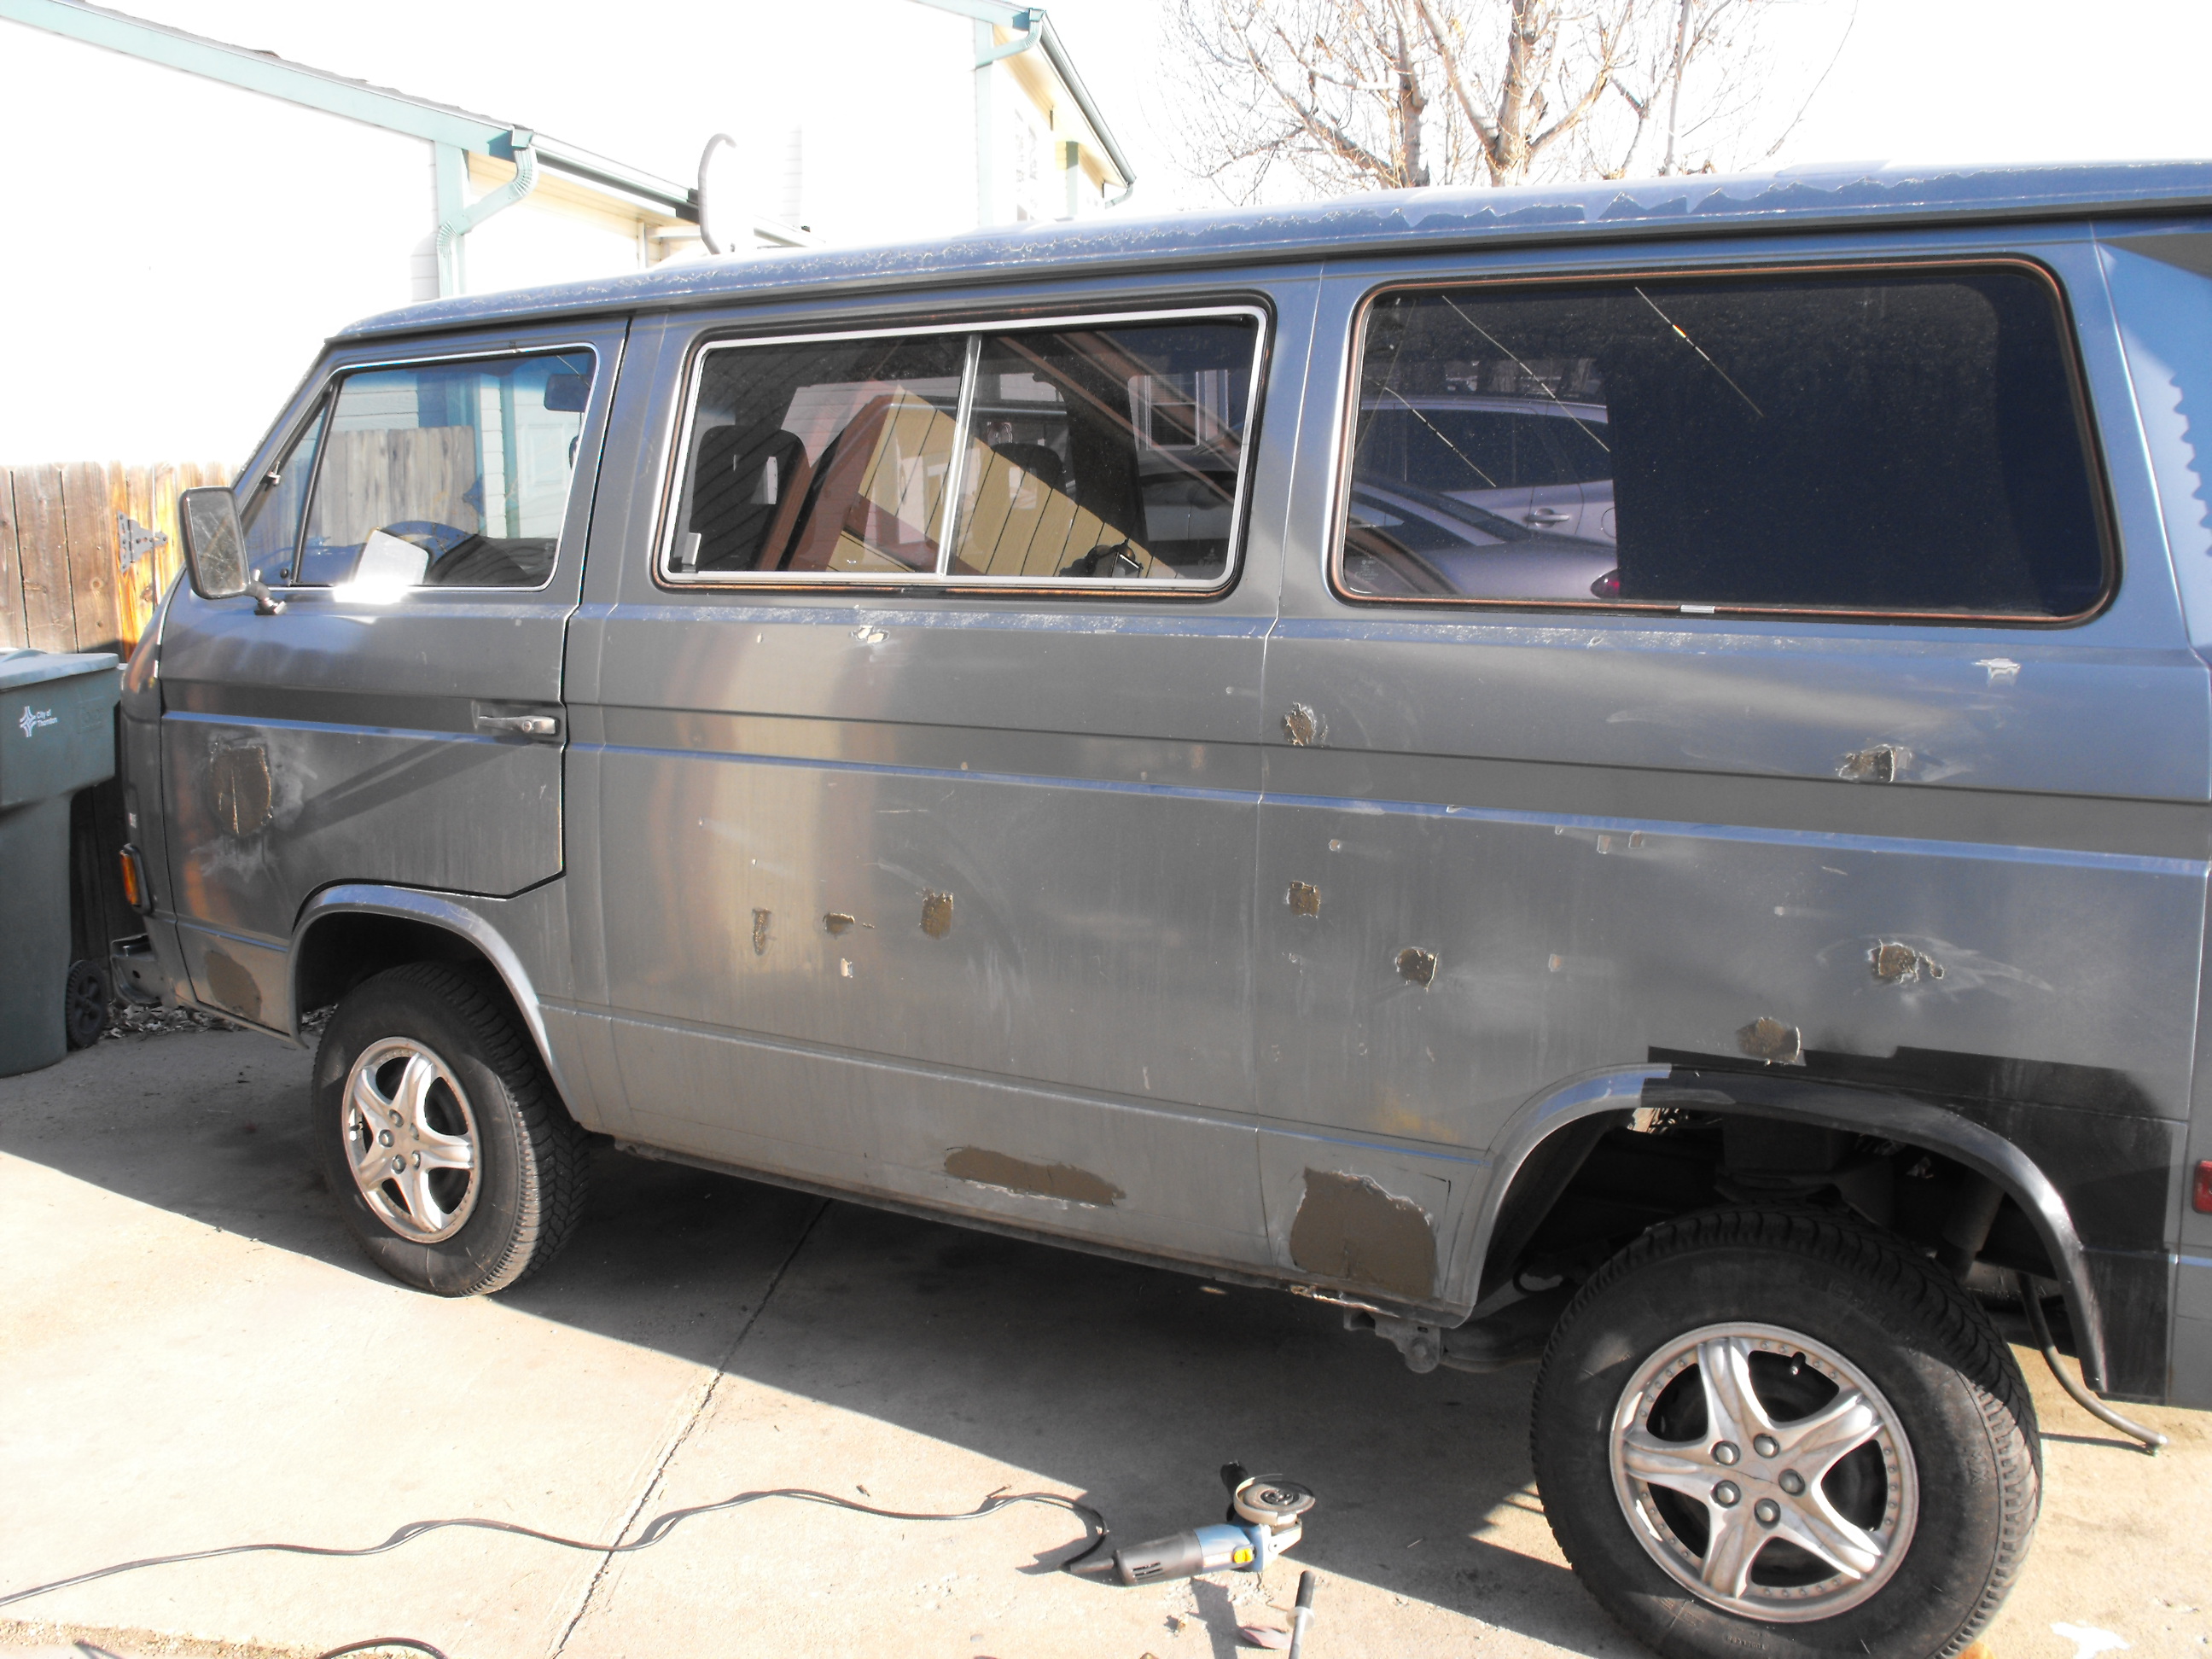
Then I ground the paint off all affected areas and did some rust removal. Then using the stud gun mapped out the areas that needed to be pulled:

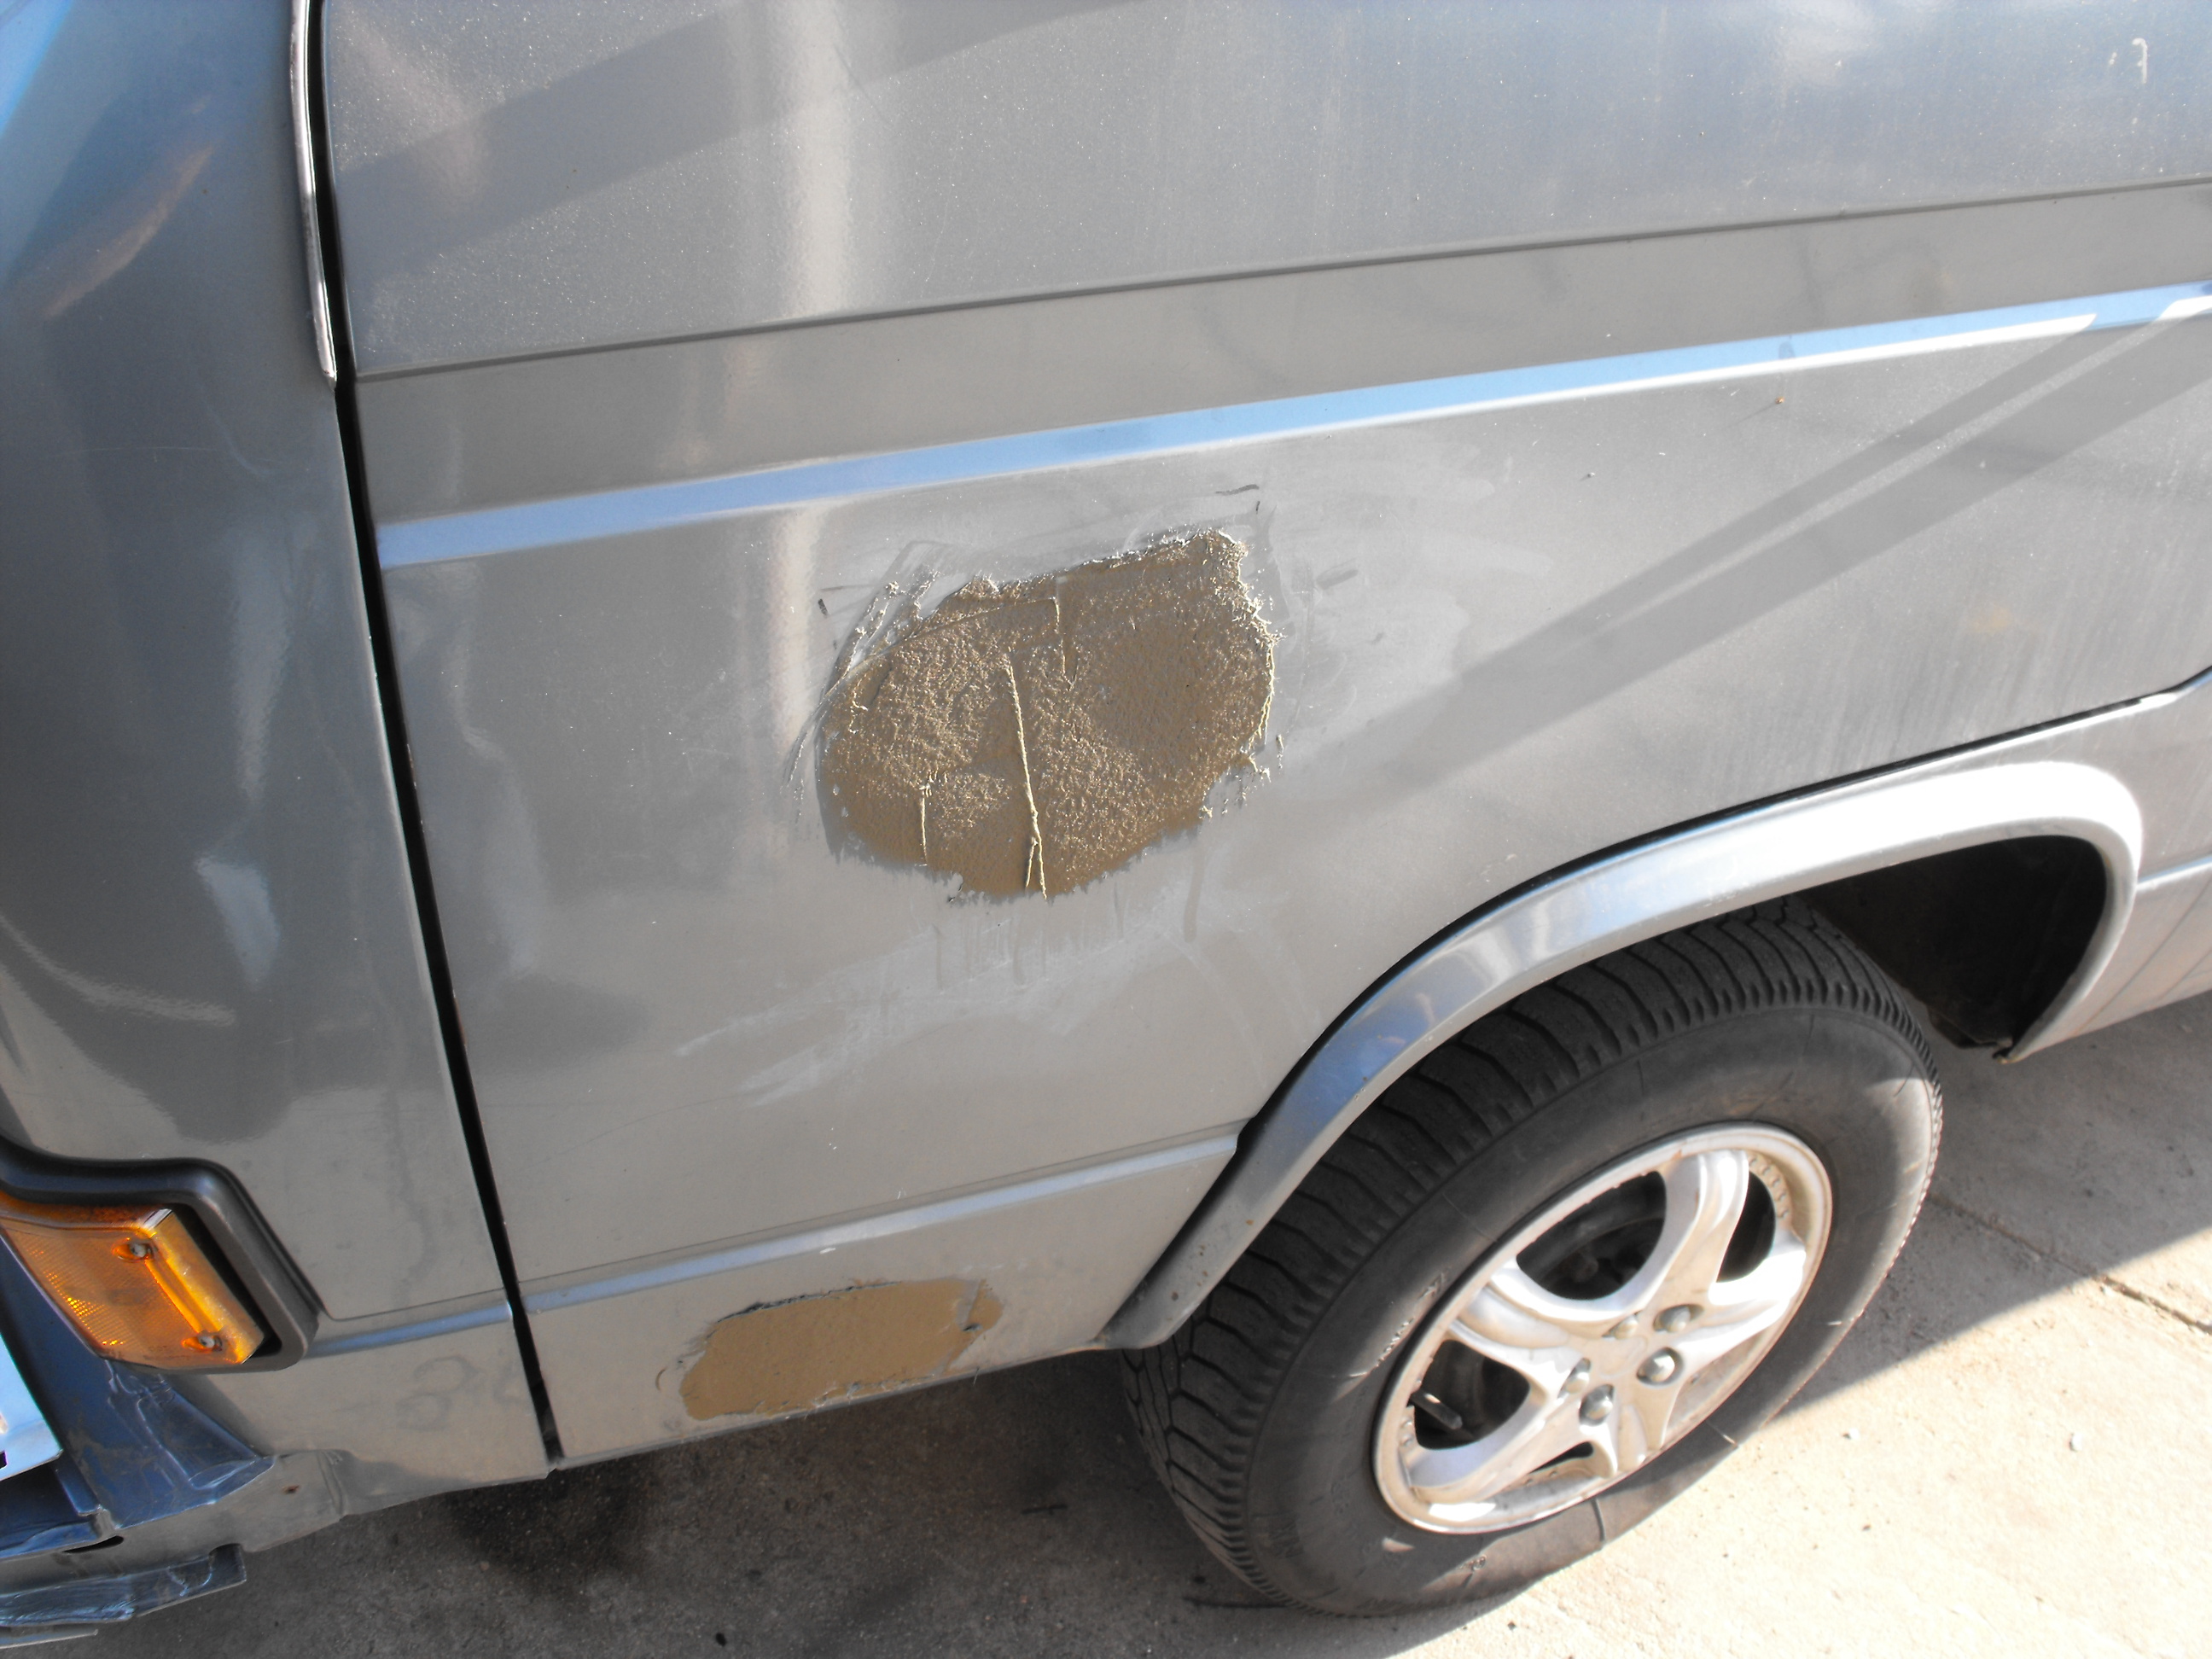
Now it’s time to add some filler (fiberglass resin-based):
The better you become at the application process the less sanding you’ll have to do:
After sanding everything for an hour and a half I decided to throw in the towel for the evening:

I got a bunch of other stuff done on top of just the body work. I spent a couple of hours flushing the cooling system of the existing contaminants and blew the lines out completely so the system can be re-filled with distilled water. The coolant reservoir had been coated with a slimy black sludge which took some amount of lacquer thinner and brake parts cleaner to clean up but the end result was a once again brand new coolant tank:

Ubercluster update
A friend was very nice and allowed me to cut a piece off his 1/2″ thick plexi-glass that fit in the cluster opening. I promptly fiber-glassed it in:

This is my first attempt at fiber-glassing anything in the way of interior pieces and approached the situation very cautiously:

I first tacked the piece and was satisfied with the positioning..

So I went ahead and locked it in and started sanding:

… and sanding…

… some more sanding …

… Gotta sand the other side …

and you guessed it, sand some more:

Still going:

I should make the energizer bunny do this!

I still haven’t finished the sanding so I can put down a layer of light and fluffy filler, more updates to come:

I am out of time and need to get my arse outside and get started for the day. I have more to share so I guess I will have to make this a double feature.
Stay tuned