For those of you long time DoogieLabs site visitors you might remember this post from long ago when I had my old house and was using zoneminder to monitor the security cameras: http://doogielabs.com/2010/11/news-for-thursday-september-25th-2010/
It has been years since I’ve used it, though I have been longing to use it again because I had great success with it. This time was a little bit different, because I could finally use the hardware that I wanted to create a perfect setup that is not some cheap ass $300 DVR with analog cameras. Though, the savings is still substantial.
One of the things I’ve wanted to task my V880 / G5 Quad with was CCTV Security. This until recently was fairly low on my priority list but now that has climbed up a bit. Someone came into my back yard and decided to help themselves to some items, and since I’m not there I was not able to immediately handle it. So I finally made my purchase.
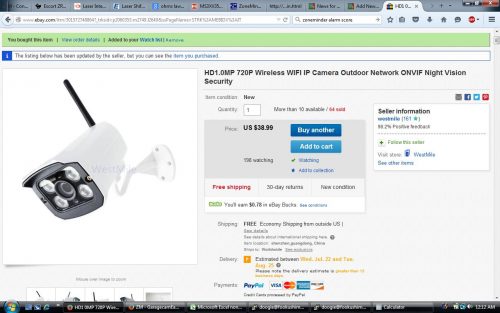
$38 / shipped on eBay landed me the first in what will be at least a half dozen cameras. Here is the eBay auction link: http://www.ebay.com/itm/301572748864?_trksid=p2060353.m2749.l2649&ssPageName=STRK%3AMEBIDX%3AIT

Why bother running a bunch of coax cable and dealing with analog stuff when you could just use your existing wireless infrastructure? I figured why not? The cameras are usually powered off of 12 volts, which means that it’s rather easy to build / create a power supply. You’ll see some interesting projects on this soon as well, as I plan on solar powering a pair of cameras and mounting them on the mailbox.
The camera model shows up as C6F0SeZ3N0P0L0. There is sporadic information available for this camera on the internet. Since I’m not home, I didn’t get a chance to look at the contents of the CD that came with the camera. Packaging was well done, and the specific one that I ordered came without a power supply as I have plenty of my own. I was able to get RTSP working in zoneminder, and for those who aren’t sure what the address is it’s rtsp://xxx.xxx.xxx.xxx:554/11 .. I also was able to get mjpeg working as well albeit at a lower frame rate. That was via the the address http://admin:admin@xxx.xxx.xxx.xxx:80/web/auto.jpg .. The trick was inserting the username and password into the URL for zoneminder, and once setup it works beautifully. I didn’t want to order more than one camera until after I was completely sure that I was able to get everything setup and working. Plus, lets face it, the thing came from China. I was not expecting a whole lot of quality for my money, but I was pleasantly surprised. The image quality was actually very good, night visibility worked out pretty well, and it seemed to be packaged okay. They are not rated for outdoor use, but that’s what I ended up doing anyway.
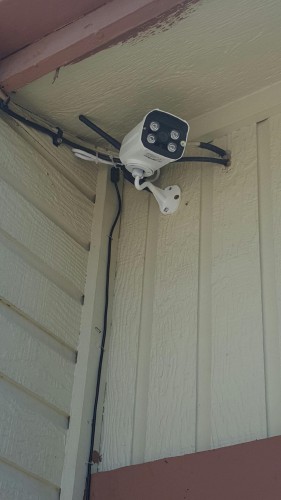
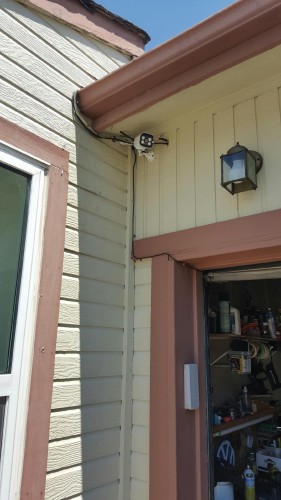
This is the installation of the first camera. Since There is a nice overhang, moisture should be kept to a minimum. The camera does also have an ethernet port, so if you’re security conscious it’s a viable alternative to the potential of someone jamming up the wireless network to black out the cameras. Wifi IP cameras do have some inherent security flaws, and after I get back perhaps I’ll examine those in greater detail. Please excuse the mounting, I know it’s not the most fantastic looking installation. Since I wasn’t there, my brother actually did the install. You’ll have to trust me when I say it’s a clean install for his usual work 😛
After the camera was setup there was the logistics of getting zoneminder working. Well, actually, I did that before mounting the camera to the garage, it spent some time in the window whilst working that out. I am using Debian Wheezy on PowerPC (The polished G5 quad) to run zoneminder from. The packaged install of zoneminder in wheezy was 1.25.0, yet the latest was 1.28.1. I had been receiving many errors with the default packaged install so I decided to compile the latest version. After hours of troubleshooting, and compiling FFMPEG, I was finally able to get things working. I still have some minor logging issues every once in a while, but it seems to work good. It’s realistically possible that if I was using a defacto standard x86 machine many of my problems would have been easily avoided, but that’d be much too easy!
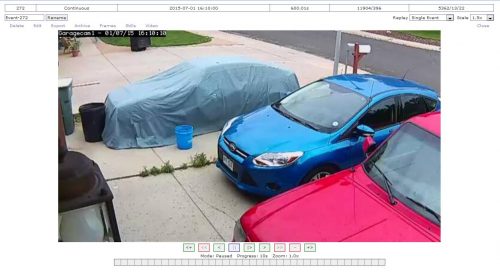
So what does it look like? Here are some screen shots of it running:
 The resolution of the camera is set at 640×352 for Mjpeg mode or 640×354 RTSP, 20 frames per second. The camera is capable of 1280×720 at a lower frame rate, but I decided I like having a decent frame rate since the image quality at the lower resolution seemed to be suitable. I’m really impressed with it actually, especially for $38 / shipped. The Infrared is actually quite bright and works well, though since I have a street light in front of my house I simply do not have the need to use the black and white mode with IR enabled. Color works just fine at night.
In conclusion, I’m going to purchasing more of these same cameras for other tasks, as well as trying out and reviewing several other cameras and their success that I have with zoneminder. I also plan to use zoneminder in the car, and there will be much more on that later. Overall I am very impressed with this cheap little camera, and I feel it has good value for the money. I hope you enjoyed this, keep an eye out for updates.


